

Have you got any videos on YouTube at all? If not, have you thought that you'd eventually like to get some videos up? If you answered yes to either of those questions, and you have a website, then bookmark this post, because you're going to need it.
This post builds on my last one, which was all about a video marketing funnel. For anyone who hasn't read it, I showed how my colleague successfully generated traffic on YouTube... without any fancy video techniques or experience. She's been sending this traffic to a squeeze page on her website, which is then converting into leads and sales.
Why Should I Put Links to my Site on My Videos?
These link annotations have proven to increase traffic and leads from YouTube.
After talking to my colleague and the case study, one thing clear: The best way to get people from YouTube to your website is to have a clickable link appear over your video telling them to do so. When talking to my colleague about what happened when she added these annotations to her videos, she said:
"Courtesy of the new changes to my videos, I'm getting 1 confirmed email sign-up for every 50 video hits now, so the cards and annotations really work. Previously I was getting 1 confirmed sign-up for every 100 views, but it is definitely more like 1 in every 30-50 views now."
These clickable annotations are getting more traffic from YouTube to her website, and more of those people are signing up to her list. They get the attention of viewers, they make a great call-to-action and they provide an instant and easy way to go to the website.
When I tried to replicate the process of setting this up, however, it wasn't so easy to figure out clearly how to add these links to my videos. It's more complicated than adding regular annotations, as there are a few things you need to set-up on your YouTube account first.
I've worked it all out now though, so I'm documenting the process in detail so you can do the same with much less hassle.
You can start once your YouTube channel has been set up, with at least one video uploaded. If you haven't done that yet, don't worry. It doesn't take long. You can find instructions in steps 3 and 4 of the previous post.
Step 1: Go to the YouTube Creator Studio
The Creator Studio is the hub from which all of the following actions will be done.
.png?10061&1432180014)
Call me daft, but I found myself getting lost in YouTube quite often. If you ever can't figure out how to get back to your video manager or other editing functions, just head back to the Creator Studio, because this is where you manage your channel.
Making sure that you're logged in to your Google account, head to YouTube. You should be automatically signed in this way. In the top right-hand corner, there's a small circle with your account picture in it. Clicking on this will drop down a list of any channels that you own.
Making sure that you have the right channel selected, click on "Creator Studio."
Step 2: Verify That You Are, in Fact, a Human
Ain't nobody got time for bots. Verifying your account is quick and painless.
Once you're in your Creator Studio, you'll see a left-hand side-bar menu. Under "Channel" you'll find "Status and features." Account status is right at the top, simply click on the "Verify" button.

Then you'll be asked to select your country. Decide whether you'd like to receive your verification code through a voice message or a text message, then choose the language you'd like your code in and enter your phone number for receiving it.

I find that the text option is easiest. Once you've submitted this information and received the text (or voice message) you'll be able to enter it into the box provided. Then your account will be verified!
.png?10061&1432185074)
YouTube knows you are not a robot and is therefore happy for you to have more freedom with your account. Now you can navigate back to your Creator Studio (as shown in Step 1) in preparation for the next step.
Step 3: Enable Monetization
This will make you a YouTube partner, another step towards linking to your site from your videos.
Monetizing your YouTube account means that you'll become a YouTube partner, and they'll be able to put ads on your videos. It also means that if your videos become popular enough and you connect up your AdSense account, you can earn money from these ads.
At this point, however, the main reason for enabling monetization is that being a YouTube partner gives you certain privileges, such as being able to link to your own website from your videos.
Under "Channel" in the left-hand menu, a few spaces down from verifying your account (which should now have "Verified" next to it), you'll see "Monetization." Click on the "Enable" button.
.png?10061&1432244186)
You'll see a page with more information about monetization. They're just short snippets about what it involves for you, so it's a good idea to read them to get an understanding for yourself of how it works.
When you're ready, click the "Enable My Account" button, and you'll be shown the terms and conditions that must be agreed to before you can proceed.
If you have no videos uploaded yet, that'll be the end of the process (although you need at least one monetized video to be a YouTube partner). You can always monetize individual videos later on.
If you do already have videos up, it'll ask you if you'd like to monetize them, and what ad formats you're OK with.

You can see previews of YouTube's ads here, and select one or more of the options if you're OK with them. Remember that you must own the material in your videos. If you've recorded them with a webcam or a slideshow of your own work, this will be fine. Just be careful to avoid material that you don't have the rights to, like your favorite song playing in the background, or a branded t-shirt with a logo on it.
Once you're done with monetization, you once again need to navigate back to the Creator Studio so that you can proceed with the next step.
Step 4: Verify That You Own Your Website
Pick method 1 OR method 2. Website verification allows you to add links to it from your videos.
This step can be a little complicated if you're not technically inclined when it comes to site-building, but for others with more experience it may be entirely straightforward. When I initially looked for information on how to do this myself, I found it very difficult to get clear instructions, so I'm hoping that this will make it easy for anyone else to do.
This time in the left-hand side-bar menu, you'll go to "Channel," but you'll click on the bottom option: "Advanced." Scroll down until you see the area called, "Associated website" and enter your website's name here.

YouTube will then tell you this website is pending, and you'll have to click on the word "verify" to move forward with this process.

You'll then be taken to Webmaster Central so that you can link your site to your Google Account. This is the complicated part. There's a fairly simple version using a plugin if you have a WordPress site, but there's also an alternative option for if you don't, or if you'd prefer not to install the plugin.
Method 1: The WordPress Plugin Option
For this option, you want to click on "Alternative methods" in Webmaster Central, and then click on the HTML tag option. This will drop-down a meta tag that you can copy and — later on — paste into the WordPress plugin.

In a new tab, open your site in WordPress, head to the plugins area and click on "Add New."

Search for "add meta tags" and it should be the first option to come up. You can also find it here. You can then click "Install Now."

Once the plugin is installed, you'll be able to activate it, and then when you go to settings in the left-hand side-bar menu of WordPress you'll see a new option called "Metadata." Click on this to go through to your new plugin!

Then you simply scroll down to where it says "Site-wide META tags" and paste the meta tag from Webmaster Central (as seen in the image at the beginning of this step).

Scroll down to the bottom of this page and "save changes." Then return to Webmaster Central and click on "Verify."

If all has gone through and been processed properly, then you should find that your website is verified and you're ready to start adding links to your videos!
Method 2: HTML File Upload (YouTube's Recommended Option)
This method of verification is YouTube's recommended option, but it's a little more complicated than doing it with the plugin. Still, if you're reluctant to use that plugin, you don't have a WordPress site or you'd just prefer to use the recommended method, then this is how it's done.
In Webmaster Central, under the recommended option tab, you'll be able to download an HTML file by clicking the provided link.

Then you'll need to upload this file to your server. I did this using the FileZilla client, which can be found here. You can use another FTP client if you are familiar with a different one, or you can download this one and follow along with my instructions for the rest of the process.
You'll need to find your server login details from your hosting provider. I just did a search in my email for the name of my hosting provider, and I found the email that they sent me just after signing up with information such as my cPanel Access and FTP details. If you don't have these details you could request them from your hosting provider.
The FTP details are what you want. Once you've loaded up FileZilla, you can enter these details.

This will connect you to your server so that you can upload the file that you downloaded from Webmaster Central. That process looks like this:

You may want to click on that image to open it in another tab so that you can see it more clearly. Basically...
- The left hand side is your computer, and the right hand side is your website information.
- The top windows are the folders, and the windows below those show the contents of whatever folders have been selected.
- You need to find the location of the file that you downloaded earlier in this step from Google Webmaster Central (see numbers 1 and 2 in the example above).
- You then need to drag it into the public_html folder on the right (see numbers 3 and 4 in the example above).
Now you have uploaded the HTML verification file to your website. You can return to Webmaster Central, and test whether it's working, using the link they've provided.

Then you can click verify, and if everything is working as it should, your website will be verified and ready to go.
.png?10061&1432266635)
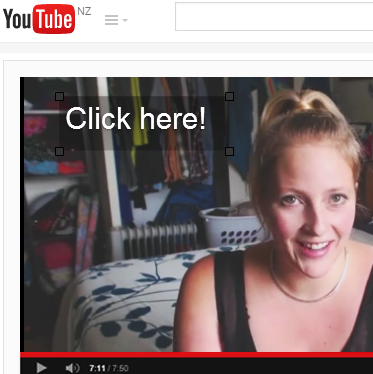
Step 5: Add Linked Annotations to Your Videos
Your account is set up and ready to go. Now it's time to actually add the linked annotations to your videos.
Congratulations! The hardest part is over! And it's worth it to be able to add these links to your videos so that you can give people a strong clickable CTA directly over your videos.
Now when you go back to your Creator Studio in YouTube (Step 1), head to the "Video Manager." You'll see a list of your videos. Click the small arrow next to "Edit" to produce a drop-down menu, and select "Annotations."

You will be given an option here to enable your account for external annotation links. You want to click "Enable" on the right-hand side.

Then you want to create a note. You can do so from the drop-down menu under "Add annotation." You can edit the text of your note in the window on the right, or by clicking in the note itself. You can change the font, the color of the text, and the color of the background.


You can adjust the time that you'd like the note to appear on the video, either using the "Start" and "End" boxes on the right, or by moving it around physically in the timeline that you'll find below the video.
At the bottom-right, you'll notice a little check box with "Link" next to it. Clicking on this will allow you to select what type of link you'd like to add. If you've followed all the steps correctly up until this point, there will now be an option from the drop-down menu here for "Associated Website."
Once you've selected this, you'll be able to add a URL for any page of your website. If you're using the video marketing funnel from the previous post, you'll want this link to lead to a squeeze page, and you'll want the text of the note to let them know what they'll get there.
For Example: The note text here could be "Click here to get your free weight-loss e-book now!" and then the link would lead to a squeeze page where people will get this e-book when they signup to your list.
Once you're done, click "Apply changes" in the top right corner, and then go to the video. Check that the note is now where you put it in the video, and that you can click it and it takes you to the right place.
You've done it! And you can continue to do this for any videos that you'd like to use to direct traffic to your website.
Bonus: Adding Cards
Cards are a lot like clickable link annotations. It's a different format for website promotion.
Another thing that worked for my colleague were Cards. When editing your videos, they're right next to annotations.

If you click "Add card" and enter the URL of your associated website, you'll be able to add a call to action and some 'teaser text' for enticing viewers to click on your card.

Then the teaser text will appear over your video, and if you click on it you'll see the full card with the call to action.

This is an option for a more aggressive brand-promotion for your website.
Don't Forget Your Takeaways!
.png?10061&1424637915)
In order to enable your YouTube account for clickable links to your website, you'll first need to:
- Verify that you're human.
- Monetize your account.
- And verify that you own your website.
You can do all of these things using the steps above. Once you have, you'll be able to add CTA notes to your videos that link back to your website. You can also make cards to further promote your site.
The benefits of this is that it increases traffic to your website as well as leads and conversions, as can be seen in the case study at the beginning of this post. It's a direct and simple way to both promote your website and get people there effortlessly.
Make $10,000 per month as an affiliate?


Tanti • 11 years ago
Thank you.
Tanti
Gina Broom • 11 years ago
Carlos Alfonso Garcia • 11 years ago
Carlos
Sunday Adenuga • 11 years ago